best pet grooming kits professional shoppers usually want one thing: a kit that cuts cleanly, stays comfortable in hand, and does not turn grooming into a stressful wrestling match for you or your pet.
If you feel overwhelmed by “all-in-one” kits online, you are not alone, many bundles look impressive but hide weak clippers, dull shears, or combs that snag. The goal here is simpler: understand what tools matter, which features separate pro-grade from “fine for one haircut,” and how to choose based on coat type and your own routine.
I will also call out the common buying traps, plus a quick checklist you can use before you hit “add to cart.” You will see a comparison table, practical steps, and a few “don’t do this” notes that save a lot of frustration.
What “Professional” Really Means in a Pet Grooming Kit
“Professional” can mean different things depending on whether you are grooming one dog at home or handling multiple coats weekly, but in practice it usually comes down to reliability, serviceability, and how the tools treat hair and skin.
- Consistent cutting power: clippers that do not bog down on dense coats, and blades that stay aligned.
- Skin-friendly finishing: combs and brushes that glide, guards that sit stable, blades that do not run hot fast.
- Replaceable parts: swappable blades, available guards, standard charger or battery support.
- Ergonomics: less hand fatigue, quieter motors, better control around ears, feet, and sanitary areas.
According to the American Kennel Club (AKC), grooming supports coat and skin health and helps you notice issues early, which is why tool quality matters beyond just “a neat haircut.”
Choosing the Right Kit by Coat Type and Grooming Goals
Many kits fail because they are “one-size-fits-all,” but coats are not. Match the kit to what you actually need to do, not what looks like a salon in a box.
Short coats (Beagles, Boxers, many Labs)
- Prioritize: rubber curry brush, soft bristle brush, nail tool, ear-cleaning basics.
- You may skip: heavy-duty clipper with multiple blades, unless you do sanitary trims.
Double coats (Huskies, Goldens, German Shepherds)
- Prioritize: undercoat rake, slicker brush, long-tooth metal comb, deshedding dryer if budget allows.
- Be careful with: full-body shaving, many double coats do better with de-shed and tidy work, ask a groomer if unsure.
Curly or continuously growing coats (Poodles, Doodles, Bichons)
- Prioritize: reliable clipper, quality guards, slicker + greyhound comb combo, straight and curved shears.
- Nice to have: detangling spray, thinning shears for blending.
Wire coats (Terriers)
- Prioritize: stripping tools if you hand-strip, otherwise a tidy kit with combs and detail trimmer.
- Reality check: coat work here can be technique-heavy, a quick session with a pro can save months of “why does it look choppy?”
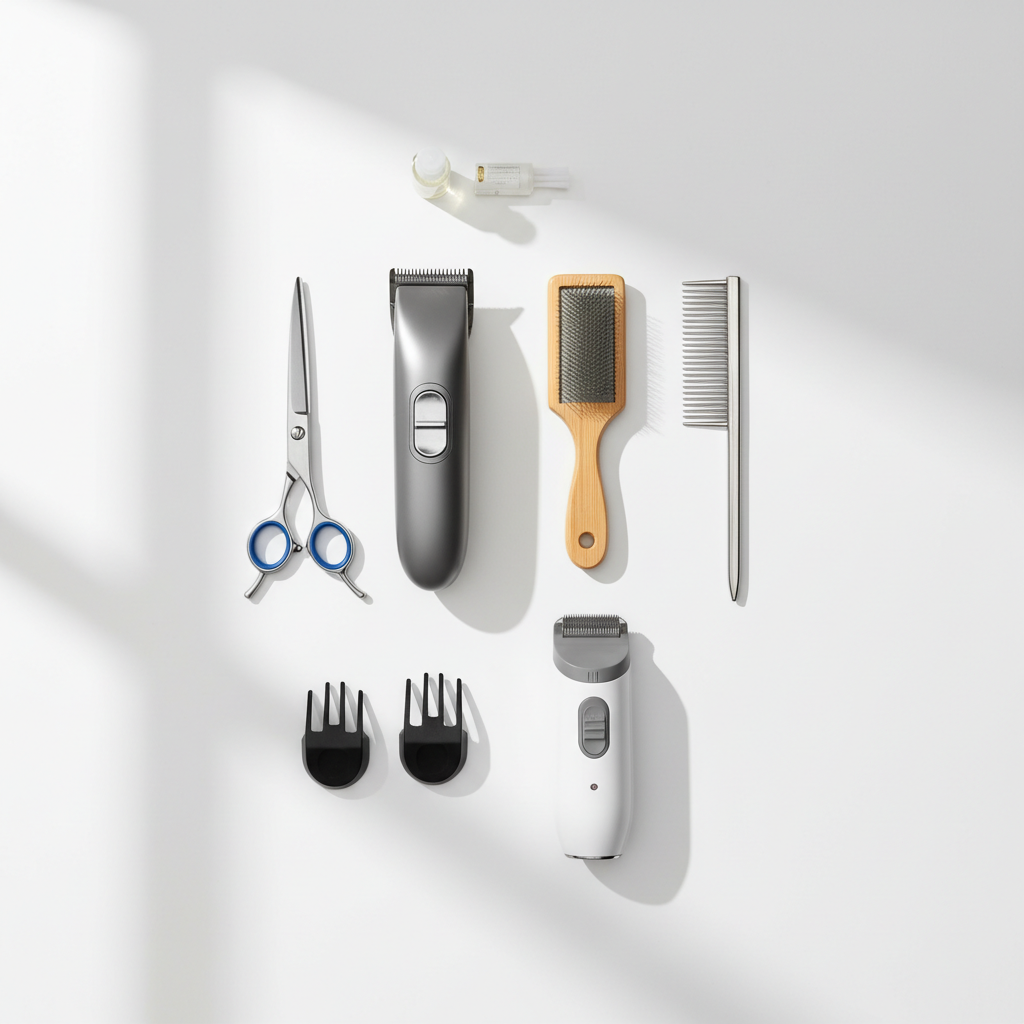
Pro-Grade Toolkit: What to Look For (and What You Can Ignore)
When people search best pet grooming kits professional options, they often assume the biggest kit is the best kit. In many cases, fewer tools with better build quality wins.
Clippers and blades
- Motor type: rotary motors tend to handle thick coats better, but design varies by brand.
- Blade ecosystem: check if it uses common detachable blade standards, that affects long-term costs and convenience.
- Heat management: look for designs known for staying cooler, and still plan blade cooling breaks.
- Corded vs cordless: cordless is convenient for wriggly pets, corded is steady for long sessions.
Shears
- Steel quality and tension: budget shears can fold hair instead of cutting cleanly, especially on curly coats.
- Minimum set: one straight shear for lines, one curved for rounds, thinning shears for soft blending.
Brushes and combs
- Slicker brush: helps separate and detangle, but can scratch if you press too hard, technique matters.
- Metal comb: the “truth teller” for mats, if the comb cannot pass, clipping over a mat can pull.
Nail tools
- Grinder vs clipper: grinders help smooth edges, clippers are faster, many people keep both.
- Styptic powder: not glamorous, but it belongs in any serious kit for small nicks.
What you can usually ignore: fancy capes, too many plastic guards with no size markings, and “bonus” scissors that feel loose at the pivot.
Quick Comparison Table: Common Kit Styles
Use this table as a sanity check before you buy, it is less about brand names and more about whether the kit matches your job.
| Kit style | Best for | Pros | Watch-outs |
|---|---|---|---|
| Cordless clipper bundle | Curly coats, tidy trims, home maintenance | Mobility, easier handling, often quieter | Battery aging, some bundles include weak guards |
| Corded heavy-duty kit | Thick coats, longer sessions, multiple pets | Steady power, fewer interruptions | Cord management, can feel heavier |
| Brush/comb de-shed kit | Double coats, shedding control | Lower cost, less risk than clipping | Needs technique, over-brushing can irritate skin |
| Detail trimmer + scissors set | Faces, paws, sanitary areas, touch-ups | Precision, quick cleanups | Not a full haircut solution for long coats |
Self-Check: Are You Buying the Right Kit?
If you answer “yes” to most of these, you are likely shopping in the right aisle. If not, adjust before spending money twice.
- I know my pet’s coat type and whether mats are a recurring issue.
- I am clear on my goal: de-shed, tidy trim, or full body haircut.
- I am comfortable doing slow, calm sessions instead of rushing.
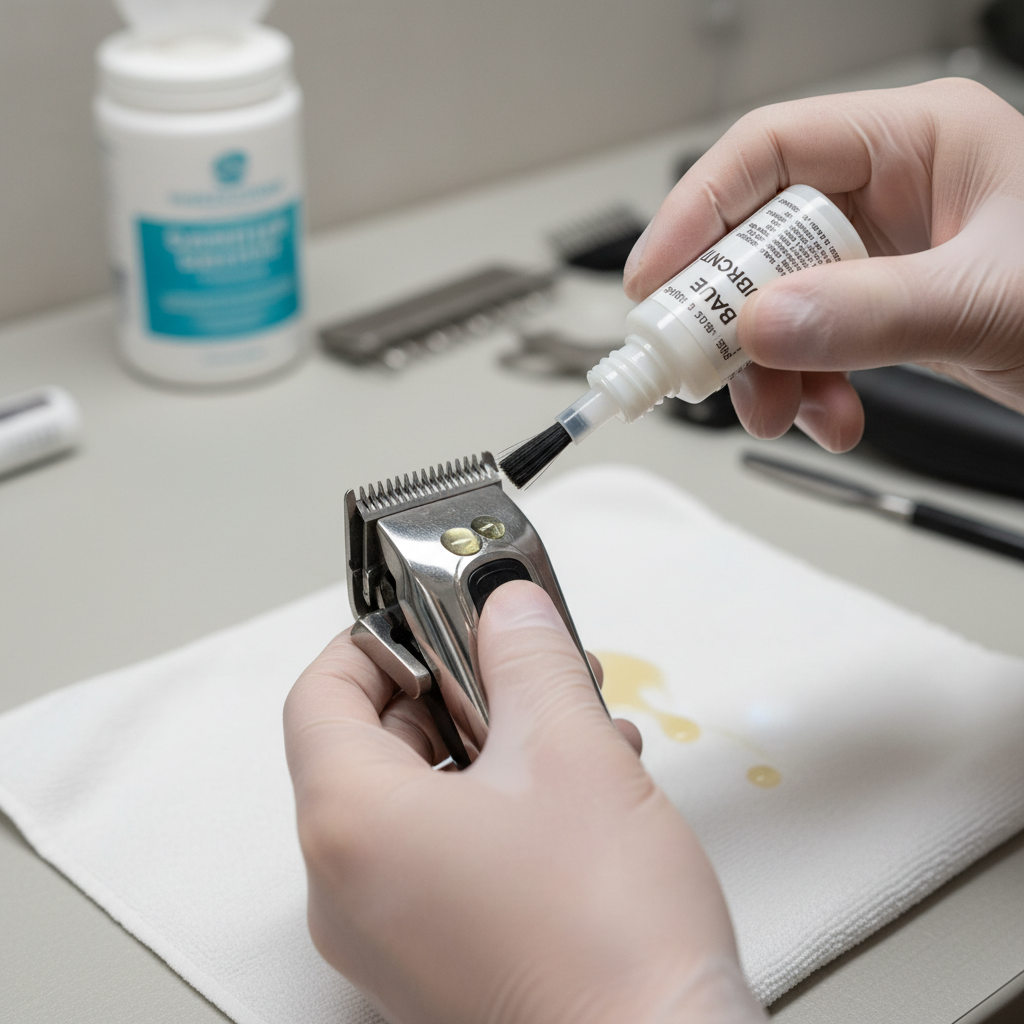
- I have a plan for maintenance: blade oil, cleaning, replacement parts.
- I have basic safety items: styptic powder, comb for mat checks, good lighting.
One more honest check: if your dog panics at buzzing sounds or hates paws being touched, the “best” kit might be the one that supports short, low-stress sessions, not the one with the most attachments.
How to Use a Professional-Style Kit Safely (Step-by-Step)
This is where a lot of at-home grooming goes sideways, not because people do not care, but because they skip prep. Prep is half the result.
1) Prep the coat before any clipping
- Brush and comb through, especially behind ears, under collar, armpits, and groin.
- If the comb cannot pass, treat it as a mat, do not run clippers over it.
- Consider a bath and fully dry for many coat types, dirty hair dulls blades faster.
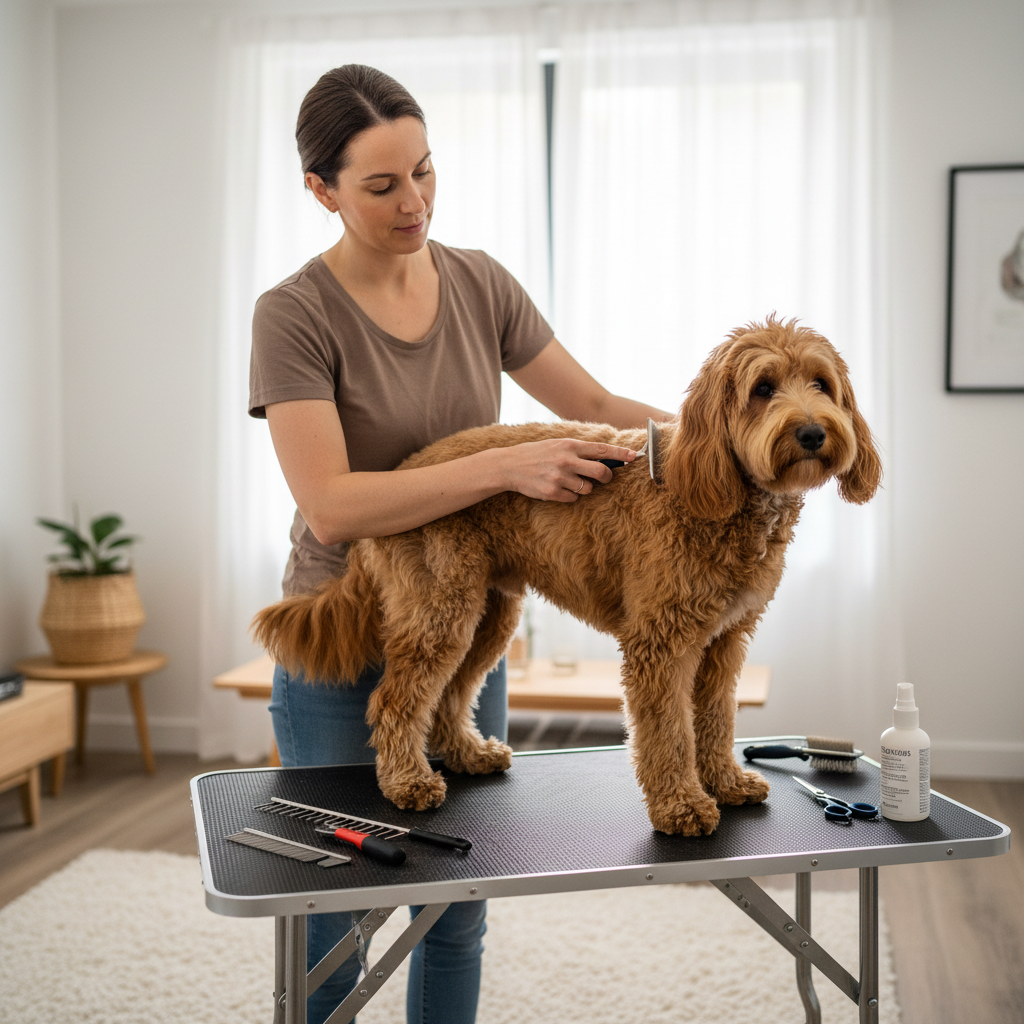
2) Set up your space
- Non-slip surface, bright light, and everything within reach.
- Keep sessions short, a calm 20 minutes beats a chaotic hour.
3) Clip with control, not speed
- Use guards for length, avoid “freehand” until you are confident.
- Move with the coat direction for smoother results, reverse only for specific finishing needs.
- Check blade temperature often, blades can get hot and cause irritation.
4) Finish with scissors for shape
- Round feet with curved shears, tidy stray hairs with straight shears.
- Use thinning shears to soften harsh lines, especially on faces.
5) Nail and ear basics
- Trim a little at a time, if you are unsure where the quick is, go slower.
- For ears, use pet-safe products, avoid inserting anything deep, when in doubt ask your vet.
According to the American Veterinary Medical Association (AVMA), it is wise to speak with your veterinarian about safe at-home care for your pet, especially if there are skin or ear concerns, or your pet has anxiety around handling.
Common Mistakes When Shopping “Best Pet Grooming Kits Professional” Lists
Many lists push whatever looks premium, but real grooming friction shows up in specific places.
- Buying a kit without a real blade system: if blades are proprietary and hard to replace, long-term upkeep gets annoying fast.
- Ignoring noise and vibration: sensitive dogs can react more to sound than to the haircut itself.
- Assuming guards solve matting: guards still require a brushed, combed coat underneath.
- Skipping tool maintenance: no oil, no cleaning, then the clipper “mysteriously” pulls hair.
- Over-deshedding: chasing zero shedding can irritate skin, back off if you see redness or your pet seems uncomfortable.
If you take one thing from this section, let it be this: “professional” is often a maintenance commitment as much as a purchase.
When to Call a Groomer or Vet Instead of DIY
Home grooming can work well, but there are times when outsourcing is smarter, safer, and sometimes cheaper than fixing a mistake.
- Severe matting: mats can hide sores and pull skin, a groomer can remove them with less discomfort.
- Ear odor, discharge, frequent head shaking: could be infection or allergies, a vet visit is usually the right move.
- Skin bumps, rashes, hot spots: clipping can worsen irritation, ask a professional before trimming.
- Aggression or panic during handling: a groomer experienced with behavior, or a vet-guided plan, may be safer.
- You need breed-standard work: especially hand-stripping and advanced scissoring, technique matters.
Key Takeaways (Save This Before You Shop)
- Match the kit to coat type, not to the size of the bundle.
- For many households, the most “pro” move is a solid clipper + comb + slicker + nail tool, then add extras later.
- If a kit has great reviews but weak maintenance support, think twice, replacement blades and parts keep costs predictable.
- Comfort and safety beat speed, especially around mats, ears, and paws.
Conclusion: Pick a Kit You Will Actually Use
Chasing the best pet grooming kits professional label only pays off if the kit fits your coat, your schedule, and your comfort level with tools. A smaller, better-made setup usually leads to calmer sessions and cleaner results, and you can always expand once you know what your pet tolerates.
If you want a simple next step, choose your coat category, buy the core tools with a reliable blade or brush system, then plan a short practice session just for handling and noise, no haircut required.
FAQ
- What makes a pet grooming kit “professional” for home use?
Usually it means the clipper cuts consistently, the blades and parts are replaceable, and the tools feel stable and comfortable in hand, even during longer sessions. - Are cordless clippers strong enough for thick or matted coats?
Some are, many are not. Thick coats often need stronger motors and sharp blades, and mats should be addressed before clipping, otherwise the tool can pull and overheat. - Do I need scissors if I already have clippers?
In most cases, yes for finishing. Clippers handle length, scissors refine shape around feet, face, and edges where guards feel bulky. - How often should I oil clipper blades?
Many groomers oil before and during a session, especially if hair builds up. Follow the manufacturer guidance, and clean hair out regularly to reduce heat and pulling. - Is it okay to shave a double-coated dog?
It depends on the dog and the reason, and opinions vary. In many cases, de-shedding and tidy trimming works better, if you are considering a full shave for comfort or health, ask a groomer or veterinarian. - What should I do if my dog is scared of the clipper sound?
Start with short exposure: turn the clipper on at a distance, reward calm behavior, then gradually get closer over multiple sessions. If fear is intense, a professional trainer or groomer may help. - Can I groom a cat with the same professional kit?
Sometimes, but cats often need quieter tools and different handling, and stress can escalate quickly. For lion cuts or heavy matting, many owners choose a cat-experienced groomer or vet clinic.
If you are trying to reduce grooming costs, keep your pet comfortable between appointments, or just want fewer “bad hair days,” a well-chosen kit and a simple routine can make a noticeable difference. If you would rather avoid guesswork, bring your pet’s coat type and your grooming goal to a groomer and ask what tools they would start with for maintenance at home.